


How To Install Your Tune-Up Kit For Fostex, Denon & Creative Labs E-MU
Skill Level: Moderate; expert-level not required. Remember, we’ve done hundreds of these and offer professional Tune-Up installation as a service as well.
Time: 30-45 minutes.
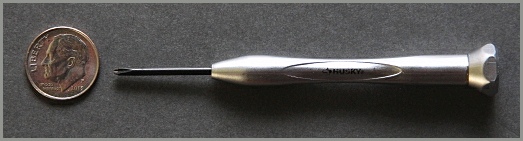
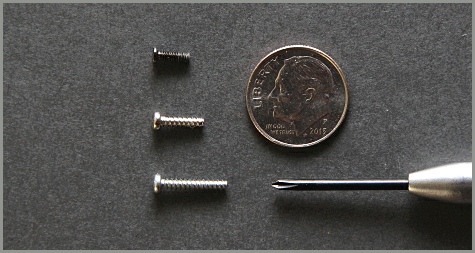
Tools Needed: Small phillips screwdriver (not provided).
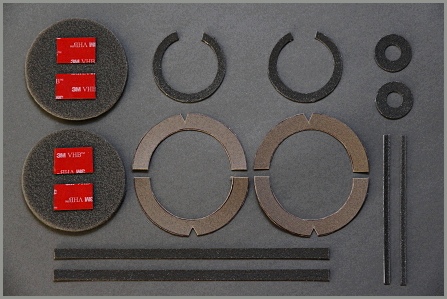
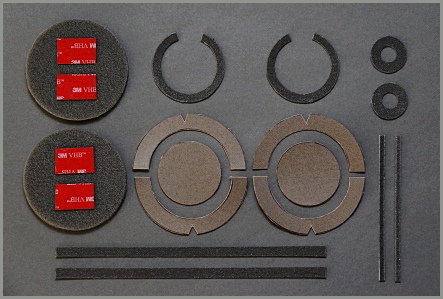
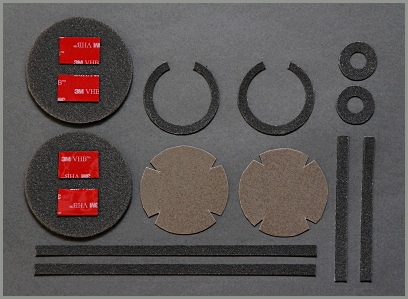
Kit Contents


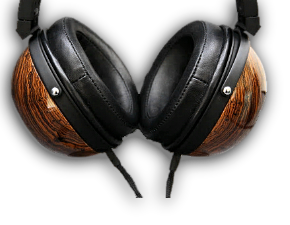
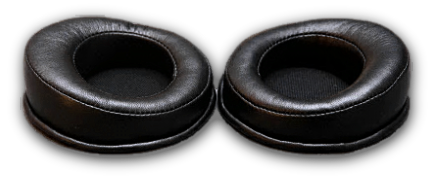
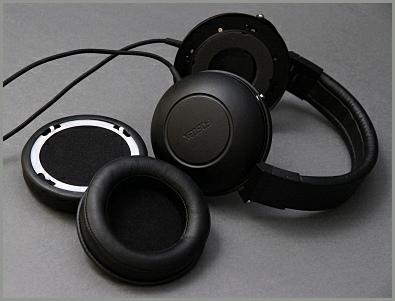
Step 1: Remove Your Pads
The pads attach to the headphone unit via a plastic ring which has 4 teeth that fit into a slot in the headphone frame.
To remove: select a point between two of the teeth, slipping your thumb under the plastic ring, and pinching the top of the pad firmly with your index finger. Gently turn/rotate/twist in a counter-clockwise motion. The teeth will slide along the slot until they all release simultaneously. The pad and the plastic ring will separate together from the headphone.
Step 1: Notes & Tips
NOTE: Pads normally come off very easily using the pinch and twist method. There is a small percentage of these plastic rings that can be a little more stubborn than others. For these cases, use caution and make sure you do NOT overly stress the teeth by pulling up on them too hard.
TIP: For these unusual cases, simply peel the pad itself right off the headphone, separating it rom the plastic ring, leaving the ring attached to the frame for now. This will not harm your pad, it will slide right off the ring. Then using a screwdriver with a flat head, push firmly against one of the teeth in the counter-clockwise direction toward the larger end of the slot; the ring should now free itself.
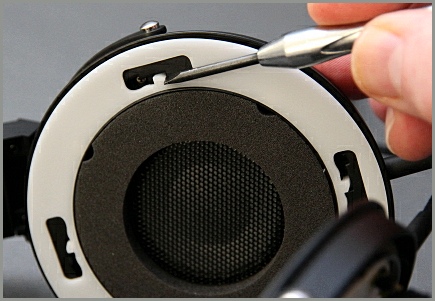


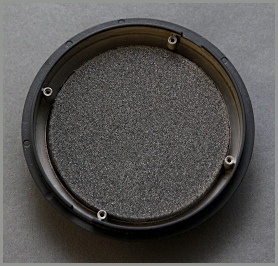
Step 2: Remove The Cups
The cups attach to the frame via 4 small phillips head screws. Screws are slightly different for each model, see below. Screws are accessed inside the unit through the larger end of the holes that hold the pads onto the headphone. Save these screws. They tend to get lost in carpets; be careful, you need them and they can’t be replaced!
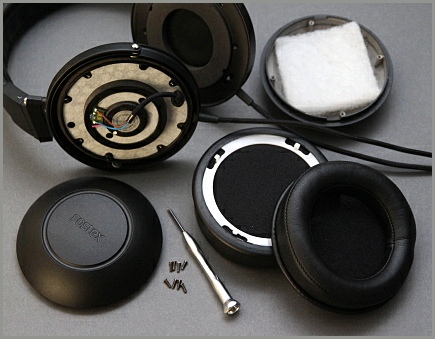


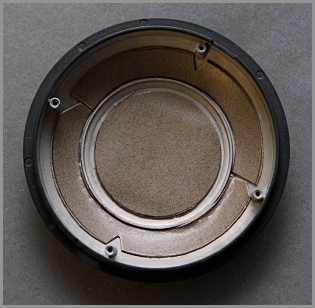
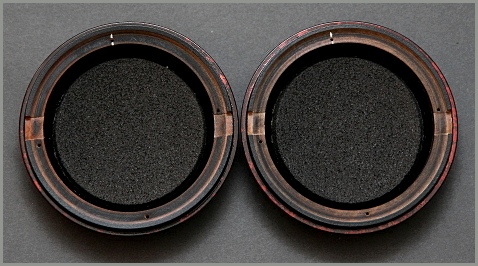
Step 3: Mod The Cups
1. Remove the factory white polyester batting material from inside the factory cups. Bits and strands of it will stick to the adhesive inside the cups, make sure to remove all of it.
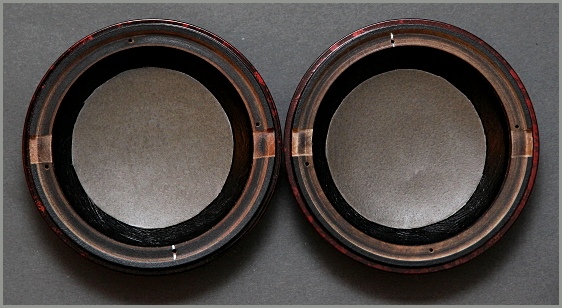
2. Remove the backing from the round gray/olive discs (piece A) and apply firmly to the inside of the cups. The Kit for each model has a slightly different set of these pieces designed to fit perfectly inside your particular unit’s cup, see below.
3. Apply the acoustic foam circles (piece B). They have a very strong adhesive attached to the rear. Remove the red backing from the adhesive strips and apply directly on top of gray/olive discs. Press firmly all over to seal. Adhesive is strong, you get one shot so aim carefully.
4.


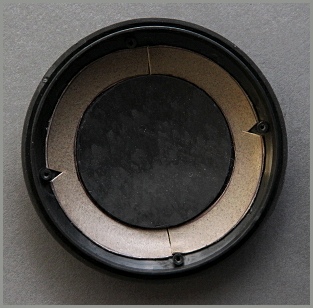


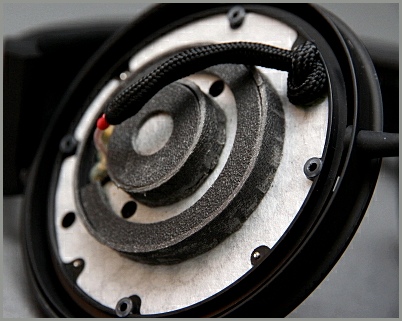
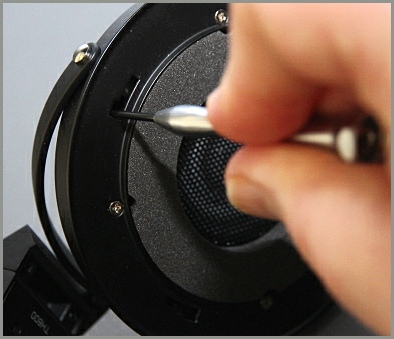
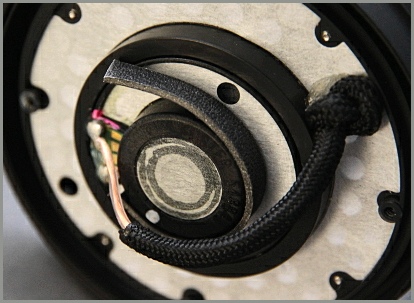
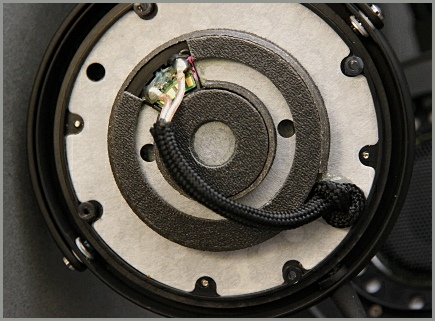
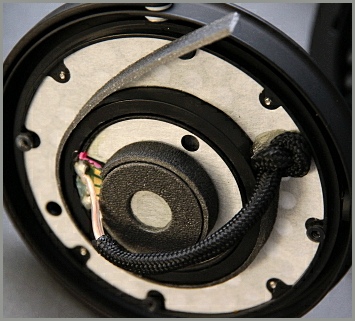
Step 4: Mod Driver Plate Rear
1. Take the short thin strip (piece C) peel off the adhesive and wrap around the outer edge of the smaller circle/driver butt, from one side of circuit board to the other as shown.
2. Work the material in and press firmly, use a tool if you like, establish a solid seal and bond and do this for all further steps. Be careful with all tools back there! Try not to puncture the thin white paper-like material.
3. Take the smaller donut (piece D) and apply to the center of the smaller circle/driver butt as shown.
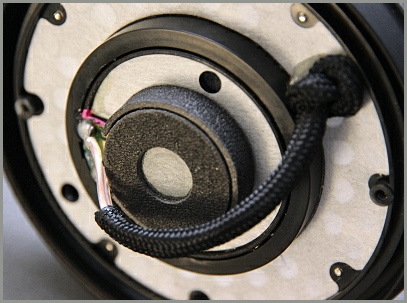
4. Take the longer thin strip (piece E), remove backing and wrap around the outside of the larger circle on driver plate rear.
5. Take the larger horseshoe circle of black material (piece F) and remove backing. Apply horseshoe firmly to top of outer/larger circle on driver plate rear. The opening accommodates the circuit board where the wires attach.
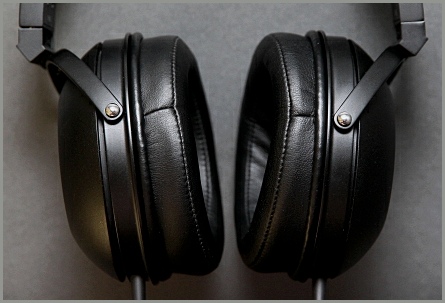
Step 4: Reassemble Headphones
1. Orient, mount and position the cups in place. Using a bright light, look inside and down through the larger end of the pad slots in the headphone frame, then rotate and adjust the cup until you can see that the cup’s screw holes are properly aligned. Carefully drop each screw into the cavity one at a time so that the tip is seated inside the screw hole of the cup. Insert and tighten one at a time, securing each screw loosely at first and then tightening each one all the way down in rotation.
2. Re-attach the pads by inserting the 4 teeth of the plastic rings into the larger end of the pad slots and then turn in a clockwise direction until they lock firmly into place.
3. Align the pads correctly so that the thinner end with the seam is in the front (toward your face when wearing them). Rotate the pads on the plastic ring so that the seams line up with the metal dimples/caps where the frame attaches to the cups assembly in the front. The Pads should rotate fairly easily for you on the plastic rings until the seams are so aligned.
That’s it! Happy listening.